Mustang

Monday, July 19, 2010

Trunk Pan Fits Like a glove


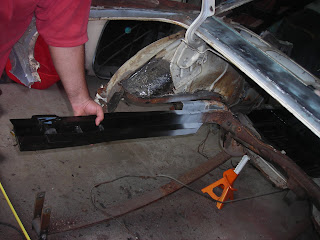
We were skeptical. Will it fit?? Well it did fit. We did have to remove the drivers side wheel wells to be able to slide the pan into place. Once they were cut out, the pan slid into place. We smiled from ear to ear, finally something went according to plan. We drilled out holes so we could spot weld the pan into place. Once we welded the pan down we attached the floor to the trunk. Then we cut out the remaining rust that was left on the floor and fitted a couple of patches. We are not quite finished but we are close to a final grind and then POR 15.

Trunk Comes Out


We thought that the trunk restore was going to be a piece of cake. It couldn't be worse than the cowl or the floors, could it?? It was downright nasty. Every spot weld was a real pain to drill out, and there must have been well over 100 spot welds in very tight spaces that needed to be broken out. We finally took the sawzall and the hammer and the metal shears and what ever we could to remove small pieces of the trunk until finally the last piece came out. Next we measured the rear frame rails so we would have the exact measurements when we put the replacement rails in. Once we had the measurements the rails were cut with the sawzall then everything was ground down and then finally treated with POR 15. We then fit the new rails into place measured and the clamped the rails into place. After one final check for correct length and height, we welded them into place. We gound all the welds down flush, then re-primed the rails. Next up, dry fitting the full trunk pan.